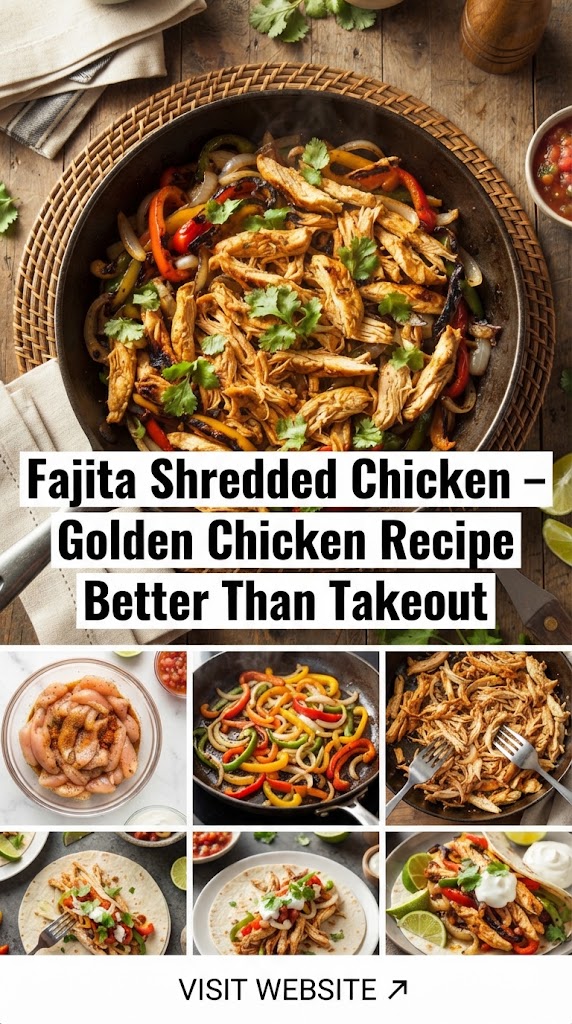
Fajita Shredded Chicken – Golden Chicken Recipe Better Than Takeout
There is a sensory experience unique to walking into a high-end Mexican cantina: the rhythmic sound of a knife hitting a wooden board, the sharp tang of fresh lime, and, most importantly, the intoxicating aroma of spiced chicken searing on a hot grill. We often think of this “takeout flavor” as a professional secret—a combination of industrial-strength burners and mystery seasonings. However, the secret to the perfect Fajita Shredded Chicken isn’t found in a restaurant kitchen; it’s found in the technique and the “Golden” preparation method.
This comprehensive guide will walk you through every nuance of creating a Fajita Shredded Chicken that is juicy, vibrantly colored, and packed with more flavor than any restaurant version. Whether you are meal prepping for a busy week or hosting a festive Friday night dinner, this golden chicken recipe will become your new culinary obsession.
The Philosophy of the “Golden” Shred
What makes this recipe “Golden”? It’s more than just a name. Most shredded chicken recipes involve boiling or poaching meat, which often results in a bland, grey, and rubbery texture. Our Golden Fajita Chicken relies on the Maillard Reaction—the chemical reaction between amino acids and reducing sugars that gives browned food its distinctive flavor.
By searing the chicken with a specific blend of spices (including turmeric, smoked paprika, and cumin), we achieve a stunning golden hue and a crust that locks in juices before the chicken is shredded. This ensures that every strand of meat is infused with smoky, savory notes, rather than just being coated in sauce.
Why Shredded Chicken Trumps Sliced Fajitas
While traditional fajitas feature strips of steak or chicken, the shredded approach offers several distinct advantages:
- Surface Area for Flavor: When chicken is shredded, it creates a massive amount of surface area. This allows the spices, lime juice, and pan drippings to coat every single fiber of the meat.
- Texture and Tenderness: Shredding breaks down the long muscle fibers, making the meat feel softer and easier to chew, which is especially important for tacos, burritos, and enchiladas.
- Versatility: Shredded chicken can be used in dozens of dishes beyond the tortilla. It integrates perfectly into salads, soups, and even pastas.
- Consistency: Every bite contains a perfect ratio of seasoning, fat, and protein.
The Essential Ingredients: A Deep Dive
To achieve better-than-takeout results, you must start with quality components. Each ingredient in this recipe serves a specific purpose in the flavor architecture.
1. The Chicken: Thighs vs. Breasts
While you can use chicken breasts, boneless, skinless chicken thighs are the gold standard for shredded fajitas. Thighs have a higher fat content, which prevents the meat from drying out during the high-heat searing process. If you prefer breasts, be prepared to reduce the cooking time slightly to maintain moisture.
2. The “Golden” Spice Rub
The spice rub is the heart of the dish. Avoid pre-packaged “fajita seasoning” packets, which are often loaded with cornstarch and excessive sodium.
- Smoked Paprika: Provides the base for the deep red-gold color and a subtle wood-fired scent.
- Ground Cumin: The earthy soul of Mexican cuisine.
- Turmeric: The secret “Golden” ingredient. Just a half-teaspoon provides a vibrant glow without overpowering the flavor.
- Garlic and Onion Powder: For a savory depth that penetrates the meat.
- Dried Mexican Oregano: More citrusy and earthy than its Mediterranean counterpart.
- Chili Powder or Ancho Powder: For a mild, fruity heat.
3. The Aromatics: Peppers and Onions
Fajitas aren’t fajitas without the “holy trinity” of bell peppers and onions.
- Bell Peppers: Use a mix of red, yellow, and orange for sweetness and visual appeal. Green peppers offer a slightly bitter, more traditional bite.
- Onions: White onions provide a sharp, clean crunch, while red onions add sweetness and color.
4. The Liquid Gold: Citrus and Fat
- Fresh Lime Juice: The acid tenderizes the meat and brightens the heavy spices.
- High-Smoke Point Oil: Use avocado oil or grapeseed oil. Olive oil can smoke too much at the temperatures required for a proper sear.
Step-by-Step: The Master Golden Recipe
Preparation: The Marination Station
Before the heat meets the meat, the chicken needs to be primed.
- Pat Dry: Use paper towels to remove all moisture from the chicken. Moisture is the enemy of a golden sear; if the chicken is wet, it will steam instead of browning.
- The Dry Rub: Coat the chicken generously in the spice blend. Don’t be afraid to massage it in. Let it sit for at least 20 minutes at room temperature, or up to 4 hours in the fridge.
- Slice the Veggies: Cut your peppers and onions into uniform strips (julienne). Consistency ensures they all cook at the same rate.
The Searing Process: Building the Color
- Heat a large cast-iron skillet or heavy-bottomed pan over medium-high heat. Add your oil.
- Once the oil is shimmering, add the chicken in a single layer. Do not crowd the pan. Work in batches if necessary.
- Sear for 5–6 minutes per side. You are looking for a deep, golden-brown crust. The turmeric and paprika will bloom in the oil, creating a rich color.
The Braise and Shred
- Once seared, add about 1/4 cup of chicken stock or water to the pan. This will “deglaze” the pan, picking up all the flavorful brown bits (fond) from the bottom.
- Cover the pan with a lid and reduce heat to low for about 5–8 minutes. This gentle steaming finishes the cooking process and makes the chicken easy to shred.
- Remove the chicken to a cutting board. Using two forks (or a stand mixer with the paddle attachment), shred the chicken into succulent strands.
The Finishing Sizzle
- In the same pan (now filled with golden chicken juices), toss in your peppers and onions. Sauté on high heat for 3–4 minutes until they are charred on the edges but still have a slight crunch.
- Add the shredded chicken back into the pan with the vegetables.
- Squeeze fresh lime juice over everything and toss to combine. The chicken will soak up the remaining juices, becoming incredibly moist and flavorful.
Multiple Cooking Methods: Choose Your Adventure
While the stovetop method provides the best sear, life sometimes requires a different approach. Here is how to adapt this recipe for other appliances:
1. The Slow Cooker Method (Set and Forget)
Ideal for busy workdays. Place the seasoned chicken, sliced onions, peppers, and a splash of lime juice in the slow cooker. Cook on Low for 6 hours or High for 3 hours. The chicken will practically fall apart. Since you miss out on the sear, add an extra teaspoon of smoked paprika and a drizzle of oil to mimic that richness.
2. The Instant Pot Method (The Time-Saver)
Perfect for when you need dinner in 30 minutes.
- Use the “Sauté” function to sear the seasoned chicken first.
- Add 1/2 cup of chicken broth.
- Cook on High Pressure for 10 minutes, then do a quick release.
- Shred the chicken and sauté with the vegetables at the end.
3. The Sheet Pan Method (The Crowd-Pleaser)
Great for serving a large group with minimal cleanup.
- Toss chicken, peppers, and onions in the spice rub and oil directly on a large baking sheet.
- Roast at 425°F (220°C) for 20–25 minutes.
- Shred the chicken directly on the pan, mixing it with the roasted juices and veggies.
Pro Tips for Restaurant-Quality Results
- The Stand Mixer Hack: If you are making a large batch, put your warm, cooked chicken thighs into a stand mixer. Turn it on low with the paddle attachment for 30 seconds. It shreds the chicken perfectly without the arm workout.
- The Rest Period: Always let your chicken rest for 5 minutes after cooking but before shredding. This allows the juices to redistribute, ensuring the meat doesn’t dry out.
- Cast Iron is King: If you have a cast-iron skillet, use it. The heat retention and distribution are unmatched for achieving that “takeout” char.
- Freshness Matters: Use fresh garlic and fresh lime juice. The bottled versions have preservatives that can leave a metallic or bitter aftertaste.
Serving Suggestions: Beyond the Basic Taco
The beauty of Fajita Shredded Chicken lies in its versatility. Here are five ways to serve it that will keep your weekly menu exciting:
1. The Ultimate Burrito Bowl
Layer cilantro-lime rice, black beans, golden shredded chicken, corn salsa, and a massive dollop of guacamole. Drizzle with a chipotle crema for a bowl that puts popular fast-casual chains to shame.
2. Loaded Fajita Nachos
Spread a layer of thick, salted tortilla chips on a baking sheet. Top with the shredded chicken and peppers, followed by a blend of Monterey Jack and Sharp Cheddar. Bake until bubbly and top with pickled jalapeños and sour cream.
3. Golden Chicken Enchiladas
Roll the shredded chicken and peppers into corn tortillas. Place them in a baking dish, cover with a rich red or green enchilada sauce, and bake with cheese until molten.
4. Low-Carb Fajita Salad
Place the warm chicken and sautéed peppers over a bed of romaine lettuce and arugula. Add sliced avocado, radishes, and a lime-vinaigrette dressing. The heat from the chicken slightly wilts the greens, creating a delicious texture contrast.
5. Mexican-Style Stuffed Sweet Potatoes
Roast a whole sweet potato, split it open, and stuff it with the fajita chicken mixture. The sweetness of the potato pairs beautifully with the smoky cumin and paprika of the chicken.
Homemade Accoutrements: Elevating the Experience
To truly beat takeout, you need the right side dishes.
The Perfect Pico de Gallo
- 4 Roma tomatoes, diced
- 1/2 white onion, finely chopped
- A handful of fresh cilantro, chopped
- 1 jalapeño, seeded and minced
- Juice of 1 lime
- Salt to taste
- Mix and let sit for 15 minutes to let the flavors marry.
Garlic-Lime Crema
- 1/2 cup sour cream or Mexican Crema
- 1 clove garlic, minced into a paste
- 1 tsp lime zest
- A pinch of salt
- Whisk together for a cooling, zesty topping.
Meal Prep and Storage: The Gift That Keeps on Giving
Fajita Shredded Chicken is a meal prepper’s dream. It actually tastes better the next day as the spices continue to penetrate the meat.
- Refrigerator: Store in an airtight container for up to 4 days.
- Freezer: This recipe freezes beautifully. Store the shredded chicken and veggies in a freezer-safe bag for up to 3 months. To reheat, thaw in the fridge overnight and sauté in a pan with a splash of water to restore the moisture.
- Reheating Tip: Avoid the microwave if possible, as it can make chicken rubbery. A quick toss in a hot skillet for 2–3 minutes will bring back that “just-cooked” texture.
The Nutritional Powerhouse
Not only is this recipe delicious, but it is also incredibly healthy.
- High Protein: Chicken thighs/breasts provide essential amino acids for muscle repair.
- Vitamin C: Bell peppers are packed with Vitamin C—more than an orange!
- Anti-Inflammatory: Turmeric and cumin have known anti-inflammatory properties.
- Low Carb/Keto Friendly: Without the tortilla, this meal is naturally low-carb and high in healthy fats and protein.
Troubleshooting Common Issues
“My chicken is dry.”
This usually happens if you use chicken breasts and overcook them. Next time, try chicken thighs. If you’re stuck with dry chicken, toss it with a little extra chicken broth and lime juice to rehydrate it.
“The spices are burning.”
If the spices are turning black and smelling bitter, your heat is too high. The paprika and turmeric can burn if the pan is scorching. Lower the heat to medium and add a tablespoon of oil to cool the surface down.
“The peppers are soggy.”
This happens when the pan is crowded. If you have too many vegetables in the pan at once, they will steam in their own moisture. Sauté them in batches or use a larger skillet to ensure they get that charred, crisp-tender finish.
Why This Recipe Works: The Science of Flavor
The reason this Fajita Shredded Chicken tastes “Better Than Takeout” is the layering of flavors. We start with a dry rub (direct seasoning), move to a sear (Maillard reaction), transition to a braise (tenderizing), and finish with acid (lime juice to cut through the fat).
Restaurants often skip these layers for the sake of speed. They might toss raw chicken onto a flat top with a liquid marinade that mostly evaporates. By taking the extra 10 minutes to sear and then shred, you are creating a complex flavor profile that simply can’t be replicated in a fast-food environment.
Conclusion: Mastering the Golden Chicken
Mastering the Fajita Shredded Chicken is a gateway to a world of culinary possibilities. It transforms the humble chicken thigh into a gourmet ingredient that brings the vibrant spirit of Mexican street food into your home kitchen.
By focusing on the “Golden” technique—the right spices, the perfect sear, and the artful shred—you eliminate the need for overpriced, sodium-heavy takeout. You gain control over the quality of your ingredients and the intensity of your flavors.
So, fire up your skillet, gather your colorful peppers, and prepare to serve a meal that will have your family and friends asking for your secret recipe. Remember, the secret isn’t just in the spices; it’s in the golden glow of a perfectly prepared meal. Enjoy your journey to becoming a fajita master!