
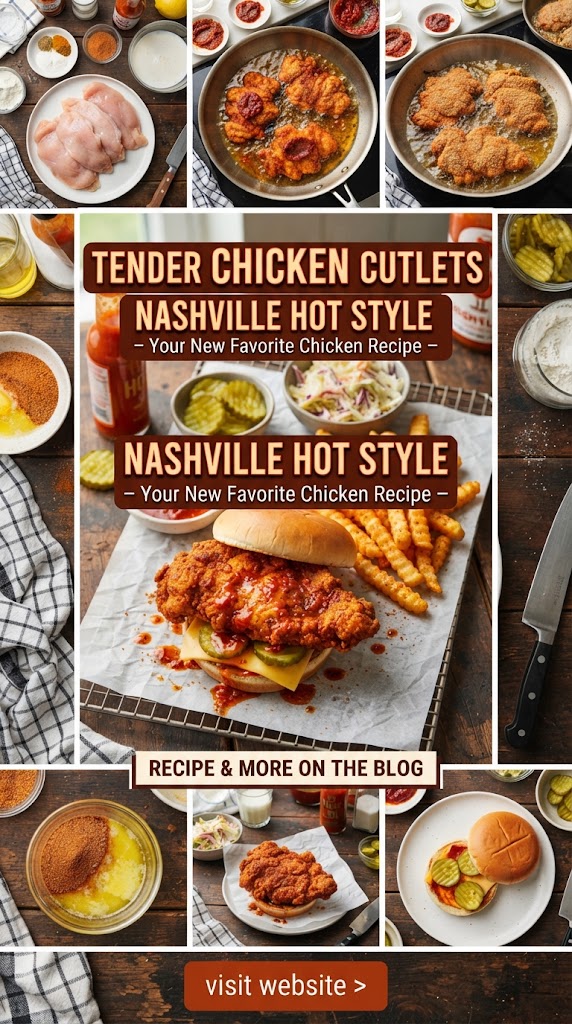
Tender Chicken Cutlets Nashville Hot Style – Your New Favorite Chicken Recipea
In the pantheon of American comfort food, few dishes command as much reverence and cult-like devotion as Nashville Hot Chicken. What started as a legendary tale of revenge in a small Nashville kitchen has transformed into a global culinary phenomenon. However, while the traditional bone-in version is iconic, there is a new contender for the crown of the ultimate weeknight dinner: Tender Chicken Cutlets Nashville Hot Style.
By utilizing the cutlet—a thinner, more uniform slice of chicken breast—you unlock a world of texture and flavor that bone-in pieces simply cannot match. You get a higher ratio of crispy, spiced breading to succulent meat, a faster cooking time, and a versatile protein that works just as well on a piece of white bread as it does in a gourmet brioche bun or atop a fresh salad. This guide will walk you through everything you need to reach “Hot Chicken” nirvana in your own kitchen.
The History of the Heat: From Revenge to Global Craze
To truly appreciate Nashville Hot Chicken, one must understand its origin. Legend has it that the dish was invented by the girlfriend of Thornton Prince in the 1930s. Suspecting him of cheating, she doused his favorite fried chicken in an excessive amount of cayenne pepper, hoping to teach him a lesson. To her surprise, he loved it, and Prince’s Hot Chicken Shack was born.
Fast forward to today, and the “Nashville Hot” flavor profile is everywhere. But what makes it “Nashville”? It’s not just about the spice; it’s about the unique application of a spicy oil paste applied immediately after frying. This “wet” spice coating differentiates it from Buffalo chicken or standard spicy fried chicken.
Why Cutlets are the Secret to Success
While wings and thighs are classic, the chicken cutlet is the unsung hero of the home kitchen. Here is why you should choose cutlets for this recipe:
- Even Cooking: Because cutlets are pounded to a uniform thickness, you don’t have to worry about the outside burning while the inside remains raw.
- Maximum Surface Area: More surface area means more room for that craggy, crispy flour coating to latch onto, which in turn means more of that spicy Nashville oil can soak in.
- Quick Turnaround: Cutlets fry in 3-4 minutes per side, making this a viable option for a busy Tuesday night.
- Tenderness: Pounding the chicken breaks down muscle fibers, ensuring every bite is melt-in-your-mouth tender.
Essential Ingredients for the Perfect Nashville Hot Cutlet
Before you heat up the oil, you need to assemble the right components. Quality matters when you’re dealing with high heat and bold spices.
The Chicken
- Chicken Breasts: Look for fresh, never-frozen organic chicken breasts. You will be slicing these horizontally and pounding them out.
The Brine (The Moisture Lock)
- Buttermilk: The acidity tenderizes the meat.
- Pickle Juice: A secret weapon in Southern frying. It adds a tang and saltiness that permeates the meat.
- Hot Sauce: A splash of vinegar-based hot sauce (like Crystal or Louisiana) starts the heat layer early.
- Egg: Acts as a binder to help the flour stick.
The Coating (The Crunch)
- All-Purpose Flour: The standard base for a classic crust.
- Cornstarch: Replacing 20% of your flour with cornstarch creates a glass-like crunch that stays crispy even after the oil is applied.
- Spices: Smoked paprika, garlic powder, onion powder, salt, and black pepper.
The Nashville Hot Glaze (The Soul)
- Lard or Frying Oil: Traditionally, lard is used, but the hot oil from your frying pan works perfectly.
- Cayenne Pepper: The star of the show. Use 2 to 4 tablespoons depending on your spice tolerance.
- Brown Sugar: This is crucial. It balances the heat and creates a slightly tacky, caramelized texture.
- Chili Powder & Smoked Paprika: Adds depth and a beautiful deep red color.
Step-by-Step Instructions: Mastering the Technique
1. Preparing the Cutlets
Start with cold chicken breasts. Lay them flat on a cutting board and, with a sharp knife, slice them horizontally (butterfly style) to create two thin pieces. Place the pieces between sheets of plastic wrap and use a meat mallet or a heavy skillet to pound them to a consistent 1/2-inch thickness. This ensures the chicken cooks at the same rate and maximizes tenderness.
2. The Double-Stage Brining Process
Most recipes tell you to just dip the chicken. We want deep flavor. Whisk together 1 cup of buttermilk, 1/4 cup of pickle juice, one egg, and 2 tablespoons of hot sauce. Submerge your cutlets in this mixture and refrigerate for at least 30 minutes, though 2 to 4 hours is the “sweet spot” for maximum moisture.
3. The Dredge
In a shallow dish, combine your flour, cornstarch, and spices. To get those extra “crags” and “nuggets” of crunch on the outside, drizzle 2 tablespoons of the buttermilk brine into the dry flour and mix it with a fork. This creates little clumps that will fry up into extra-crispy bits.
Remove a cutlet from the brine, let the excess drip off, and press it firmly into the flour. Flip and repeat, ensuring every millimeter of the chicken is covered. Set the breaded cutlets on a wire rack for 10 minutes before frying; this helps the coating “set” so it doesn’t fall off in the pan.
4. The Science of Frying
Use a heavy-bottomed skillet (cast iron is king here). Fill it with about an inch of high-smoke-point oil (peanut, canola, or grapeseed). Heat the oil to 350°F (175°C).
Carefully lay the cutlets away from you into the hot oil. Do not overcrowd the pan—fry in batches if necessary. Fry for 3 to 4 minutes per side until the internal temperature reaches 165°F and the crust is a deep golden brown.
5. Creating the “Hot” Glaze
This is where the magic happens. While the chicken is resting on a clean wire rack, take a heat-proof bowl. Add your cayenne, brown sugar, paprika, and garlic powder. Carefully ladle about 1/2 cup of the hot frying oil into the spices. It will sizzle and bloom, releasing an incredible aroma. Whisk it until the sugar has mostly dissolved.
6. The Finish
Using a pastry brush, liberally coat each fried cutlet with the spicy oil. Alternatively, you can briefly dip the entire cutlet into the oil for a “true Nashville” experience, though brushing allows you to control the heat level more effectively.
Heat Levels: Finding Your Signature Spice
Not everyone can handle “The Reaper” level of spice. Here is how to adjust your glaze:
- Mild: 1 tbsp Cayenne, 2 tbsp Brown Sugar.
- Medium: 2 tbsp Cayenne, 1 tbsp Brown Sugar, 1 tsp Chili Powder.
- Hot: 3-4 tbsp Cayenne, 1 tsp Red Pepper Flakes, 1/2 tsp Ghost Pepper powder (optional).
- Nashville Traditional: High Cayenne, high heat oil, and a touch of vinegar.
Pro-Tips for the Best Results
- Don’t Skip the Wire Rack: If you place hot fried chicken on a paper towel, the bottom will steam and become soggy. A wire rack allows air to circulate, keeping the crust crisp on all sides.
- Oil Temperature Management: When you add the chicken, the oil temperature will drop. Adjust your burner to keep it as close to 350°F as possible. If the oil is too cold, the chicken will be greasy; if it’s too hot, the breading will burn before the meat is cooked.
- The “Dry Hand/Wet Hand” Method: When breading, use one hand for the wet brine and the other for the dry flour. This prevents your fingers from becoming “club-like” breaded stumps.
How to Serve Nashville Hot Cutlets
The presentation is just as important as the flavor. To serve it the traditional way, you need:
- Plain White Bread: It’s not just a side; it’s a sponge for the spicy oil. By the time you finish the chicken, the bread is the best part.
- Dill Pickle Chips: The acidity and crunch of the pickles cut through the richness of the fried coating and the heat of the cayenne.
- Creamy Coleslaw: A cold, vinegar-based or creamy slaw provides a necessary temperature and texture contrast.
- The Sandwich Route: Place a cutlet on a toasted brioche bun with spicy mayo, shredded lettuce, and extra pickles for a world-class chicken sandwich.
Healthier Alternative: The Air Fryer Version
If you love the flavor but want to skip the deep-frying, you can still achieve a fantastic result with an air fryer.
- Follow the brining and breading steps as usual, but add a little more oil (or melted butter) directly into the flour mixture to help it brown.
- Preheat the air fryer to 375°F.
- Spray the cutlets generously with oil spray.
- Air fry for 12-15 minutes, flipping halfway through, until crispy.
- Brush on the Nashville Hot glaze (you’ll need to heat some oil separately since you won’t have frying oil).
Frequently Asked Questions (FAQs)
Can I use chicken thighs instead of cutlets?
Absolutely. However, thighs are thicker and take longer to cook. You may need to fry them for 6-8 minutes per side and ensure the internal temperature reaches 175°F for the best texture.
How do I store and reheat leftovers?
Nashville Hot Chicken is best fresh, but you can store it in an airtight container in the fridge for up to 3 days. To reheat, avoid the microwave! Place them in a 350°F oven or air fryer for 5-7 minutes to bring back the crunch.
Is Nashville Hot Chicken keto-friendly?
In its traditional form, no. However, you can make it keto by using almond flour and crushed pork rinds for the breading, and skipping the brown sugar in the glaze (use a keto-friendly sweetener like erythritol instead).
Why is my breading falling off?
This usually happens for two reasons: the chicken was too wet when it hit the flour, or you didn’t let the breaded chicken “rest” before frying. Letting it rest allows the flour to hydrate and bond with the meat.
Why This Recipe Will Become Your New Favorite
In a world of bland chicken recipes, Nashville Hot Cutlets stand out. They offer a sensory experience that hits every note: salty, sweet, spicy, crunchy, and juicy. It’s a dish that feels like an event, whether you’re serving it for a Sunday football game or a sophisticated dinner party with a spicy twist.
The beauty of the cutlet version is its approachability. You don’t need a professional deep fryer or hours of prep time. With a few pantry staples and a bit of “hot oil” magic, you can bring the taste of Music City right into your own kitchen.
Final Thoughts: Respect the Heat
The first time you try this recipe, start with a “Medium” heat level. The cayenne builds as you eat, and what feels fine on the first bite might have you reaching for the milk by the third. But that’s the joy of Nashville Hot Chicken—it’s a culinary challenge, a comfort food classic, and a flavor explosion all rolled into one golden-brown, spice-drenched cutlet.
Get your cast iron skillet ready, turn up the country music, and prepare to fall in love with the bold, unapologetic flavors of Tender Chicken Cutlets Nashville Hot Style. Your taste buds will thank you—even if they’re tingling for hours afterward!